Meteora in Unity
This project recreates Meteora in Unity. Meteora is a rock formation in central Greece that has monasteries perched on rock pillars. The monasteries were built in the 14th century to escape Turkish raiders and until the 17th century the only way to get up to them was by ladder or ropes. The project is an immersive experience for PC and Quest 2 as well as a video. You visit different locations around the site via teleport platforms.
The terrain model and the scattering of trees, bushes etc. was created in Houdini and brought into Unity via Houdini Engine. The buildings were modelled from reference images in Rhino. Some textures were created in Substance Designer while the rest were downloaded from the Substance asset library.
The generation of the terrain was broken down into a number of tasks in Houdini. It makes use of PDG (procedural dependency graph) where tasks write their geometry to disk. This allows tasks to be re-run without having to re-run every task it depends on. The tasks are defined inside a HDA (Houdini digital asset) which is imported into Unity via Houdini Engine. The HDA can expose parameters and regenerate geometry from Unity.
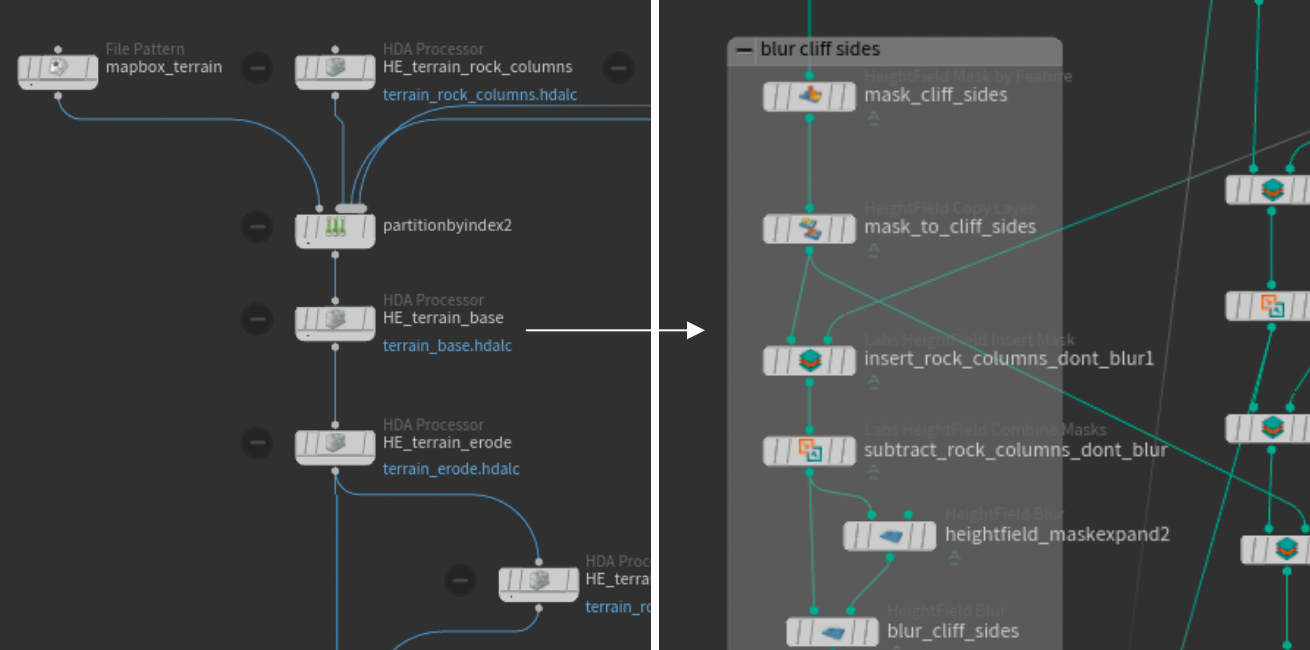
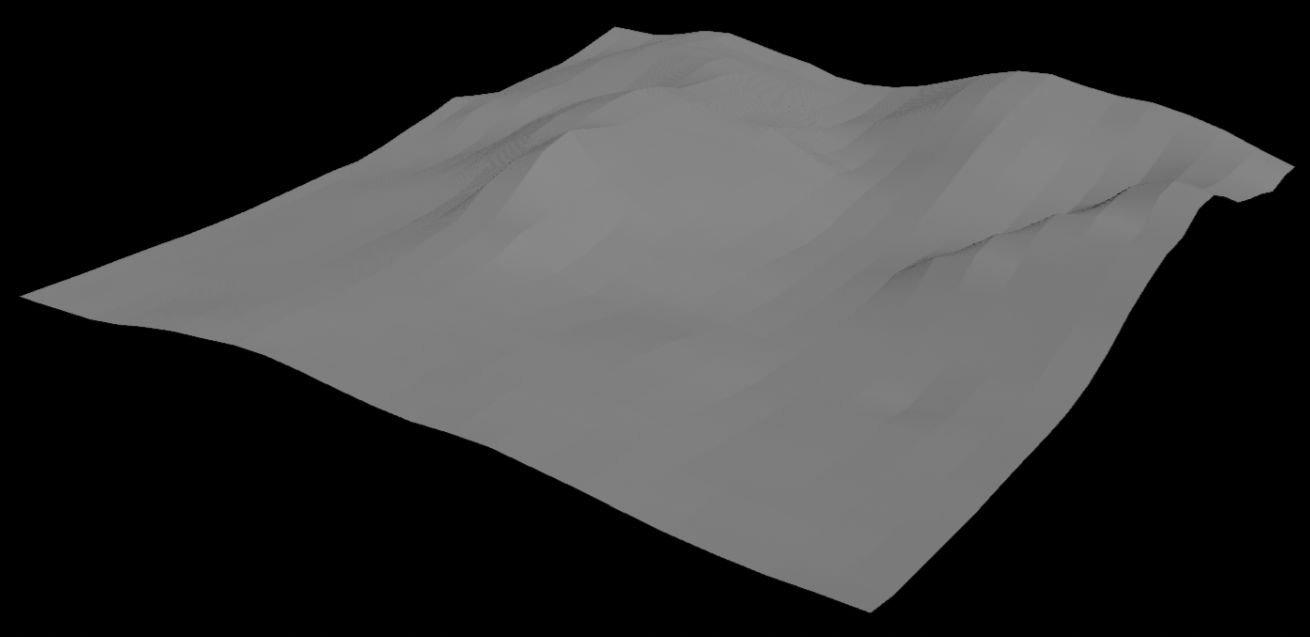
Low resolution terrain data was fetched from Mapbox.
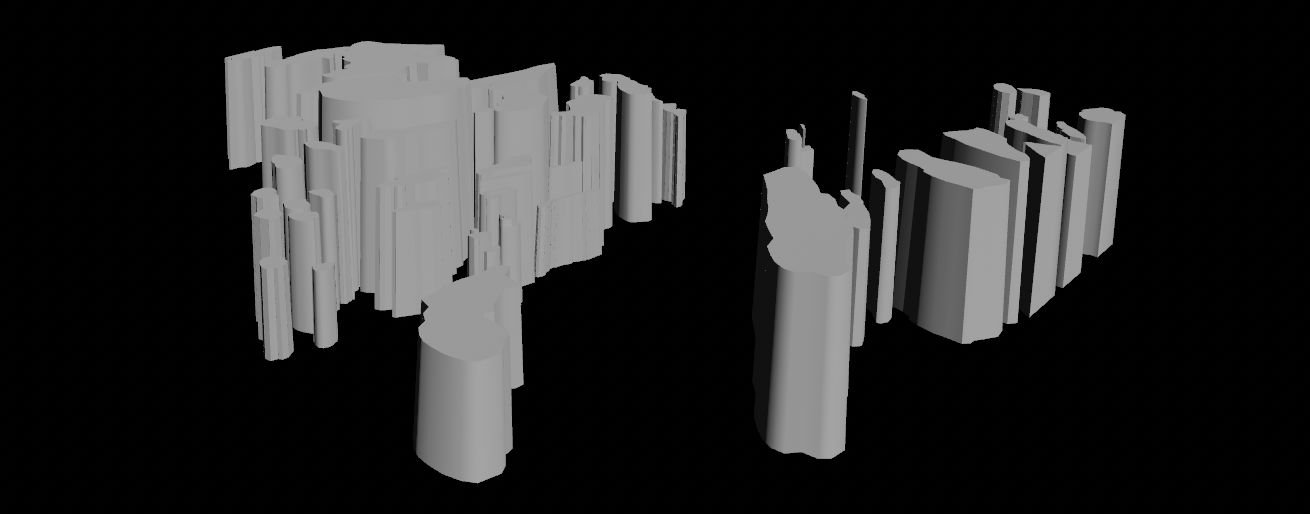
I then used screenshots from Google Earth to trace the outlines of the rock pillars and extrude them upwards. Google Earth has a handy feature where it will tell you the height of the terrain under the mouse so I used this to determine the height of the rock pillars.
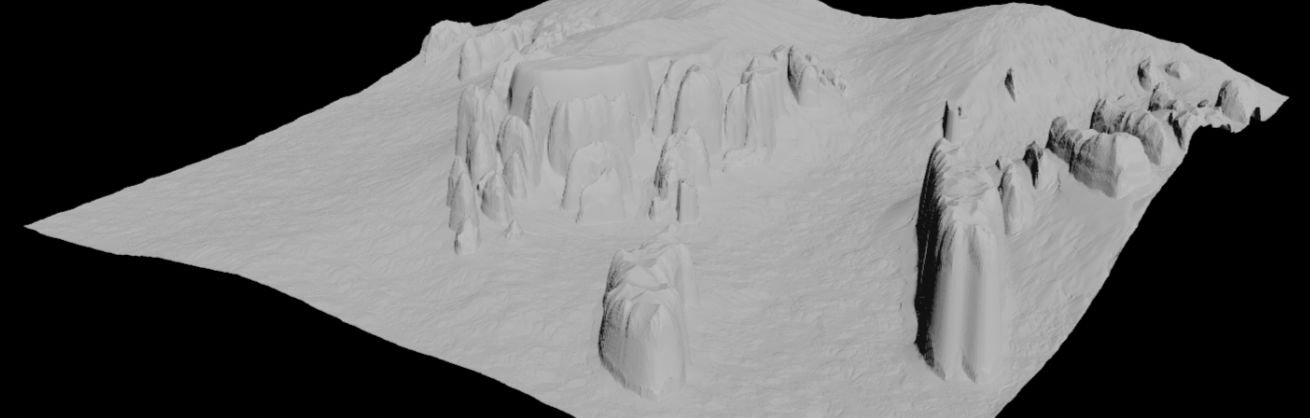
The rock pillars were merged with the base height field. The tops of the rock pillars were blurred to give them a more rounded appearance and noise was added to give a more natural rocky appearance. I had to flatten the courtyards of the monasteries so buildings didn’t end up buried in the ground. I created the courtyard shapes in Rhino and imported them into Houdini and used them to mask out certain areas that received noise. The terrain was then eroded by water and temperature and slumping was applied to give the appearance of depositing of sediment when water runs down the slopes.
The roads were traced from Google Earth and projected onto the terrain.

Masks were created for each of the terrain layers using criteria like slope and height. I had to be careful that none of the masks overlapped or Unity would render the overlap washed out.
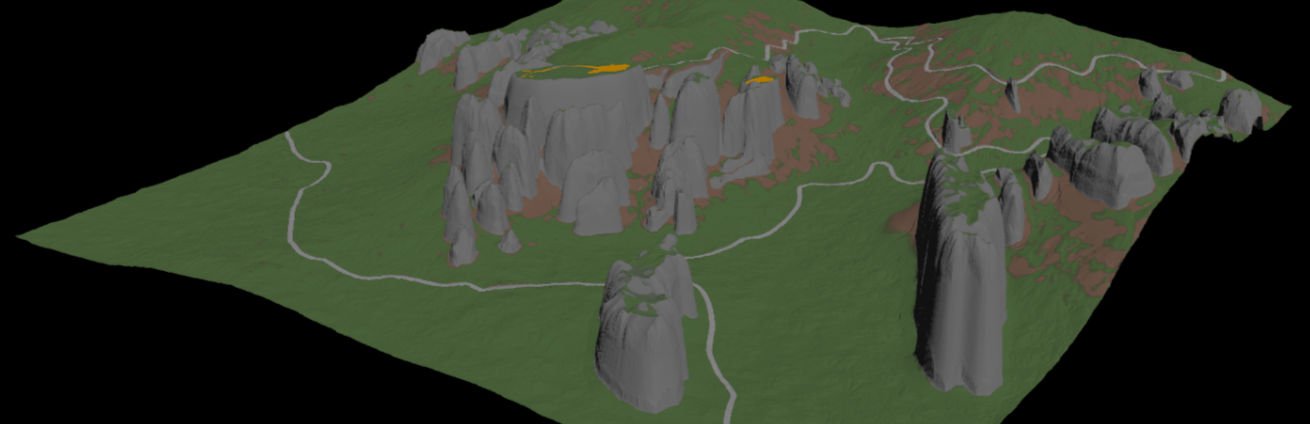
Unity has a maximum terrain size of 4097 (4096 + grid size, which is 1 in my case) but a maximum splat texture size of 4096. The terrain layers use splat textures where each channel in the image corresponds to a terrain layer. Houdini generates the splat texture size the same as the terrain size and hits this limit. The solution is to split the terrain into tiles which also helps with performance. In this instance I split the terrain into 4 tiles.
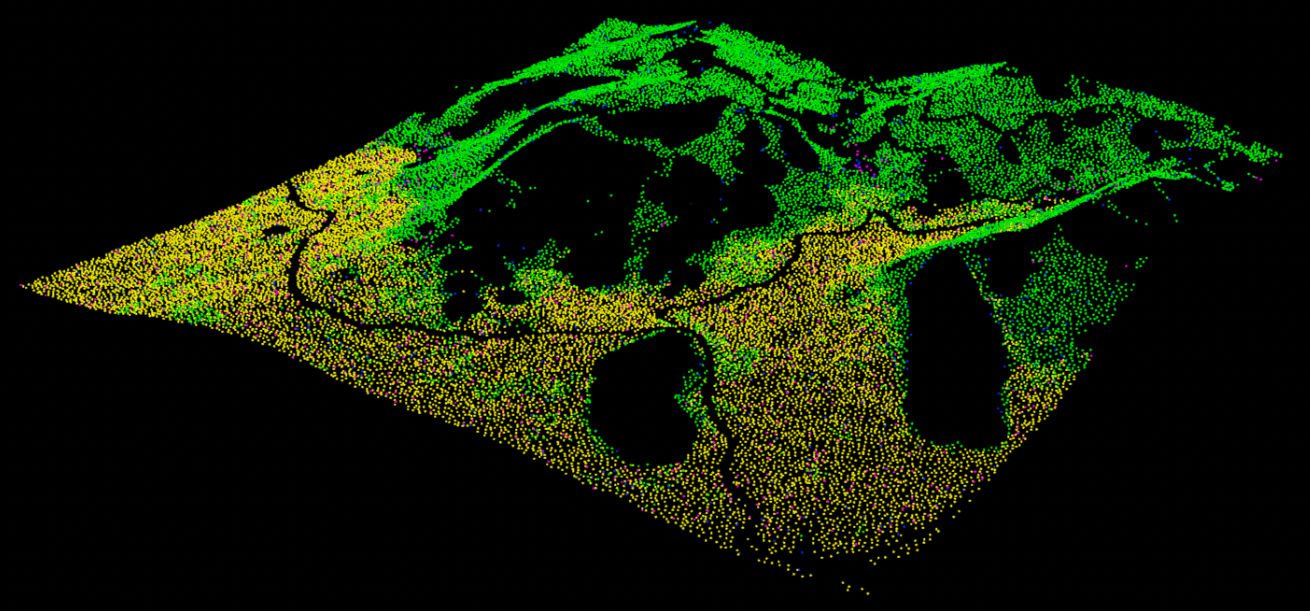
For the flora and rocks, points were scattered across the terrain. Some Vex (Houdini’s scripting language) was used to make sure that points didn’t collide with each other. Unity’s prefab directory was scanned and prefabs were randomly assigned to each of the points.
I tried Blender, Maya, 3ds Max, Modo and Cinema 4D but none had full support for walls and openings so I settled on Rhino which is a general purpose CAD application that has support for meshes or can convert NURBS to meshes on export.
The terrain model was imported into Rhino as a mesh. This helped to position the buildings. I used Google Earth to draw the roof plan of the buildings. From the roof plan I derived the wall plan and extruded them up to create the walls. For the window and door openings I drew the elevation onto the faces of the walls using Google Earth and Google Images for reference.
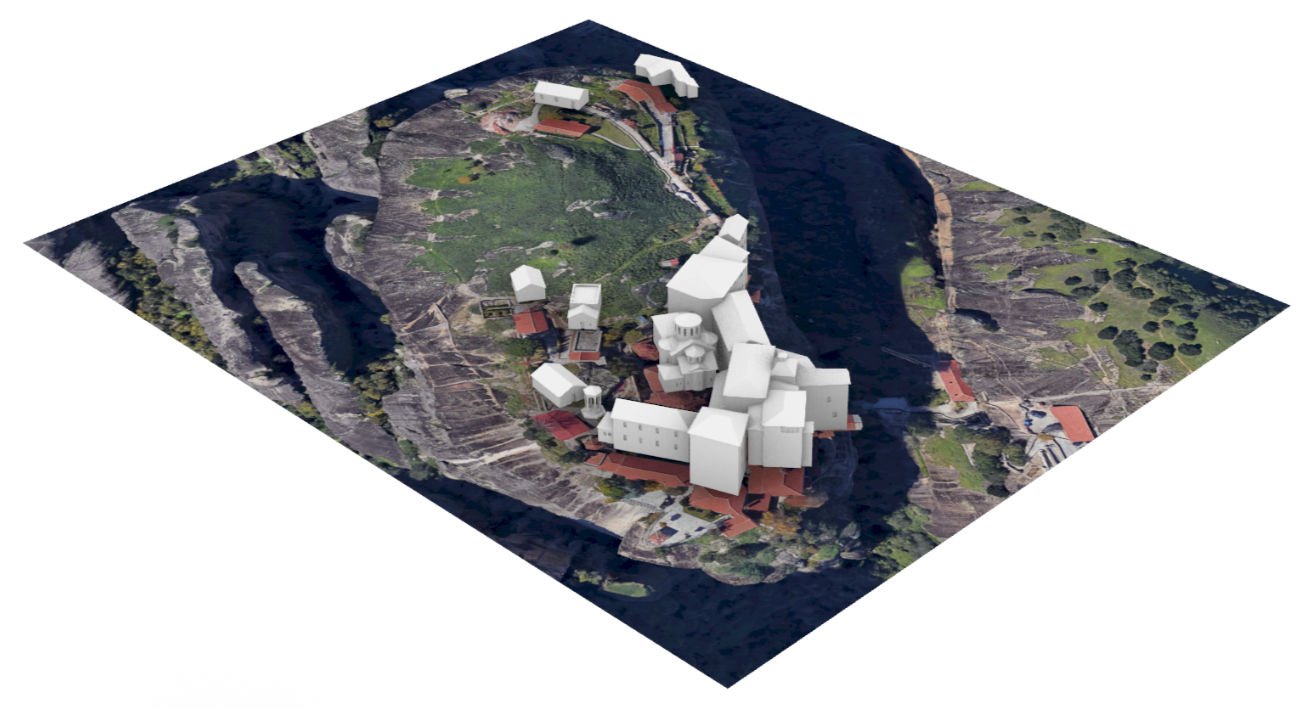
The next step was to apply UV mapping to all the geometry and assign materials. The materials in Rhino were placeholders and were replaced with Unity materials after import.
The rock pillars, dirt, road and opening backing plane textures were created in Substance Designer. Like Houdini, Substance Designer is procedural and you create textures by connecting nodes together. For the others I downloaded pre-built textures from the Substance asset library. These textures are parametric so you can create variations. For the walls and roofs I created 3 variations of each so that the monastery building clusters didn't look too uniform.
All the Unity shots for the video where done using Cine Machine (a Unity package). You create a virtual camera for each shot and a dolly if needed. Each virtual camera can have its own post processing effects. Subtle use of motion blur, depth of field, bloom and colour grading was used. The Unity footage was then brought into Final Cut Pro along with titles created in Apple Motion.